Composting turns kitchen scraps and yard trimmings into a dark, crumbly soil amendment that feeds plants and keeps waste out of the trash. The second sentence: you’ll notice the scent changes as decomposition progresses—from a grassy sharpness to an earthy, forest-floor smell—and that signal tells you what the pile needs next.
A basic bin gives you control over moisture, airflow, and access, so decomposition is faster and less messy than an unmanaged heap.
Pick the right spot and time it for your climate
Location affects daily use and performance. Put the bin close enough to the kitchen for easy drop-offs, but far enough that occasional flies or a faint odor won’t bother living spaces.
A level spot near beds or planting areas saves hauling time when you spread finished compost. Partial sun—morning sun, afternoon shade—is usually best: full sun can dry the pile too quickly; deep shade slows microbial activity.
Sunlight, drainage, and frost: how they change what you do
- Sunlight: A morning-sun site warms the pile early in the day without baking it. If your bin sits under a southern exposure, plan for extra moisture inputs.
- Drainage: Place the bin on soil or gravel so excess liquid drains and worms and microbes can migrate in. If you must set it on concrete or a deck, elevate it and drill extra drainage holes.
- Frost: In cold regions, biological activity slows under frost. Insulate an outdoor pile with straw or a tarp in winter, or move a small plastic or worm bin to an unheated garage for year-round processing.
Which bin type should you choose—and why
There’s no one perfect design. Your choice depends on volume, aesthetics, budget, and how much labor you want to invest. Below are reliable options and the honest trade-offs.
- Plastic storage tubs: Cheap, tidy, and beginner-friendly. Drill ventilation and drainage holes and layer with coarse material on the bottom. They lose heat faster and can degrade in sunlight.
- Wooden boxes (rot-resistant lumber or plywood with a 2×4 frame): Better insulation and attractive in a garden. Use untreated wood or naturally rot-resistant species like cedar. Slight carpentry skills required.
- Wire or mesh cylinders: Fast to assemble and ventilated. Use poultry wire or hardware cloth rolled into a 3–4 ft diameter column. They dry quickly and offer little rodent protection.
- Pallet bins: Low- or no-cost option that provides volume and airflow. Use three pallets for three sides and a removable front pallet. Check pallets for chemical stamps and clean them before use.
Decision factors
Choose plastic for small indoor/outdoor setups and low fuss. Choose wood when insulation and longevity matter. Choose mesh when ventilation is essential and pests aren’t a concern. A three-bin wooden system is worth it when you want continuous batches and easier turning.
Tools, materials, and a basic cut list for a 3′ x3′ wooden bin
A3′ x3′ box is a practical home size—large enough to retain heat but manageable for turning and harvesting. The list below is a starting point you can scale.
- Materials: one 23″ x23″ exterior plywood base (or skip base and set on soil), four 2x4s cut to 36″ for corner posts, six 36″ boards (1×6 or 2×6) for slatted walls, screws or galvanized nails,1/4″ drill bit for drainage holes.
- Tools: drill/driver, circular saw or handsaw, tape measure, level, pencil, safety glasses, work gloves.
Before fastening, dry-fit pieces and mark hole positions. Drill several1/4″ holes in the base for drainage, or leave gaps between floor slats if you omit the plywood base.
Step-by-step assembly that keeps airflow and access simple
These steps make a solid, accessible bin. Skip or adapt steps if using a plastic tote, wire ring, or pallet assembly.
- Step 1 — Prepare the site: Level a3′ x3′ patch of ground, remove sod or mulch, and add a coarse 2–3″ twig layer or gravel if drainage is poor.
- Step 2 — Build the base and corner posts: Secure two 2×4 sleepers to the base plywood, set and fasten the four corner posts to those sleepers.
- Step 3 — Attach side boards: Fasten horizontal slats to posts with 1–2″ gaps between boards for airflow. Make the front middle board removable or hinged for compost removal.
- Step 4 — Ventilation and drainage: Drill1/4″ holes near the bottom and leave chosen gaps between slats. Add a simple lid to keep excess rain out and deter pests.
- Step 5 — Seed the pile: Place 2–3″ of coarse browns, then a thin layer of garden soil or finished compost to introduce microbes.
Why base, walls, ventilation, and access matter?
Drainage prevents soggy, anaerobic conditions that smell and slow decomposition. Ventilation supplies oxygen for aerobic microbes that generate heat. A removable front board significantly reduces the time it takes to harvest finished compost; lack of access is one of the most regretted design choices.
What to put in the bin and how to layer for faster results?
Successful composting is a balance. Aim roughly for a 2–3:1 volume ratio of browns to greens for many home systems; that gives microbes the carbon they need while supplying enough nitrogen to keep activity brisk.
- Greens (nitrogen): vegetable scraps, fruit waste, coffee grounds, fresh grass clippings, green plant trimmings.
- Browns (carbon): dry leaves, shredded cardboard, paper, straw, sawdust from untreated wood.
- Avoid: meat, dairy, oils, pet feces, and persistent weeds that set seed—these attract pests or pass disease.
Layer:2–3″ of browns,2–3″ of greens, and a thin cover of browns to limit flies. Moisture should be like a wrung-out sponge; when you squeeze a handful, it should hold shape and release a drop or two, but not drizzle.
Moisture, aeration, turning, and worm tips
Too dry = slow breakdown; too wet = sour, anaerobic smell. If dry, add water and greens; if soggy, add dry browns and increase aeration. Turning every 2–3 weeks speeds hot composting by redistributing heat and oxygen. If you prefer low effort, insert a few perforated PVC aeration pipes instead of regular turning.
Worms: red wrigglers (Eisenia fetida) are the preferred species for vermicomposting. They thrive in shallower, cooler bins with moist bedding. Worm systems are worth it when you want fast, fine castings from kitchen scraps in a limited space.
Pest and disease prevention, spacing, and practical routines
Pests and disease usually point to mistakes—exposed food, added meat/dairy, or gaps that allow rodents. Follow decisive rules and a simple schedule to minimize problems.
- Pest rules: never add meat/dairy; bury fresh food scraps under 2–3″ of browns; secure a tight lid; cover any ground-level larger-than-1/2″ gaps; use hardware cloth under wire bins.
- Disease avoidance: skip diseased plants or compost them separately in a managed hot pile for several months; avoid adding invasive weedy seeds unless your pile reaches sustained high temperatures.
- Spacing guidance: allow at least 1–2 ft clearance around the bin for airflow and working room; position bins near water access for easy wetting in dry spells.
- Maintenance rhythm: check moisture weekly, add material as generated, and turn according to your chosen process: hot systems every 2–3 weeks; passive systems only when harvesting.
What people miss: a small “browns” bucket kept near the kitchen makes it much easier to follow the layering rule—without it you’ll find yourself skipping the dry cover and then fixing fruit fly problems later.
Troubleshooting quick fixes
Smelly/anaerobic: Add dry browns, turn the pile, and stop adding fresh wet food for a few days. Improve drainage if soggy.
- Slow breakdown: Add more greens and turn to raise the temperature; add a few shovels of finished compost or garden soil to seed microbes.
- Fruit flies: Bury fruit scraps deeper, add a top layer of browns, and use a tightly fitted lid until the population drops.
- Rodent intrusion: Seal gaps, avoid food scraps with fat, and line the base with hardware cloth or switch to an enclosed plastic bin.
When to harvest and how to use finished compost?
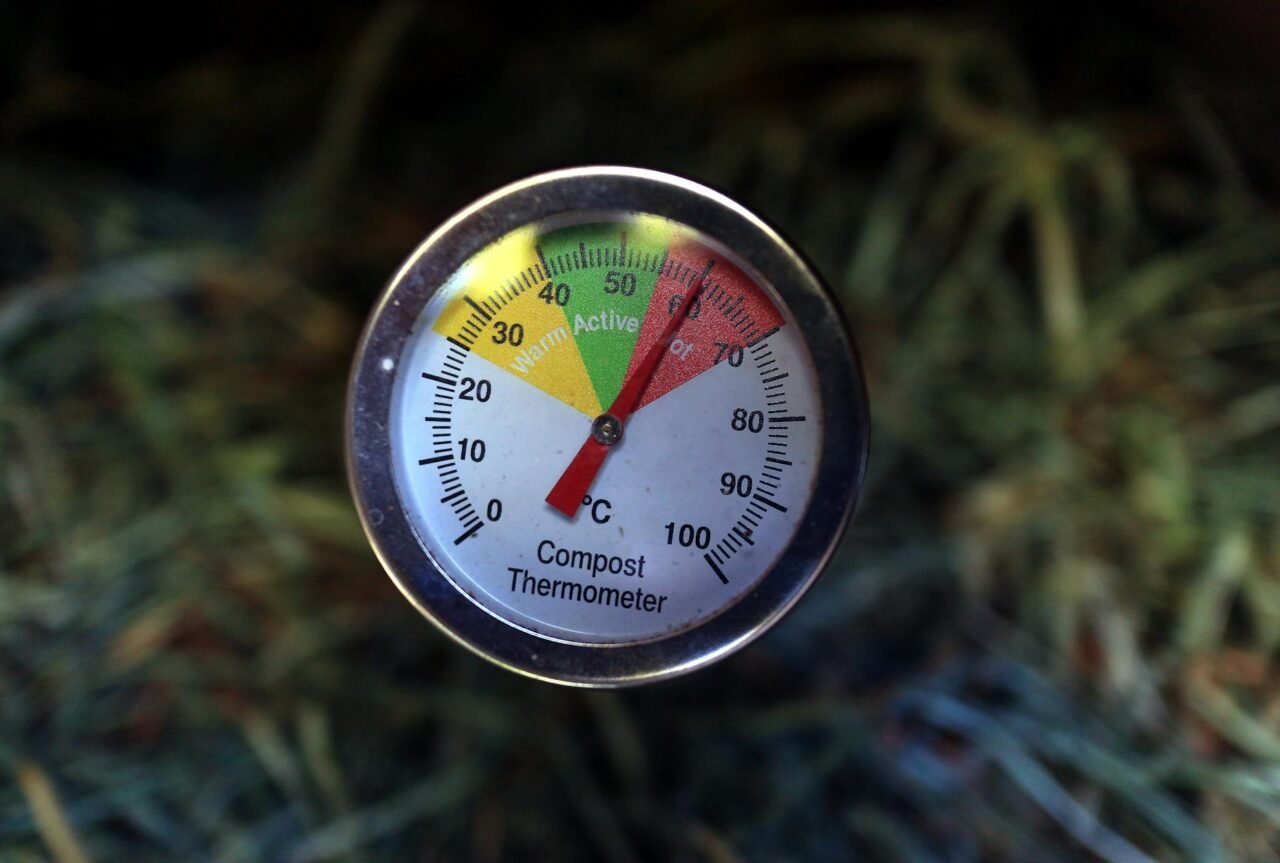
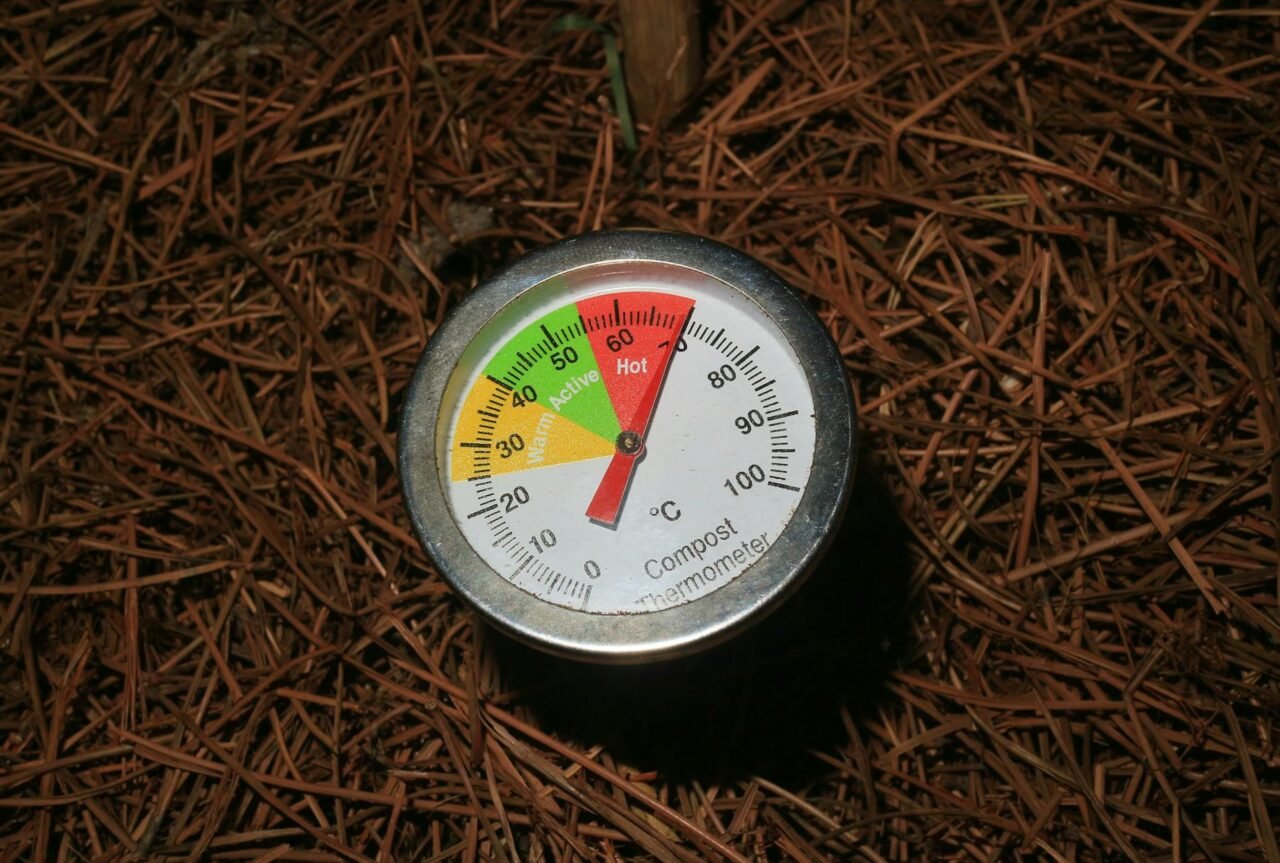
Compost is ready when it’s dark brown, crumbly, and smells like fresh earth. You shouldn’t be able to identify input materials, and the heap should be cool. Typical timing:2–6 months for actively managed “hot” piles,6–12 months for passive systems—colder climates skew toward the longer end.
Use finished compost as a soil amendment mixed into beds, as a top-dressing, or in potting mixes. Apply 1–2 inches to vegetable beds in spring or work in a light layer before planting.
Realistic example scenario
Household: two adults with a small vegetable garden and weekly kitchen scraps. Decision: build a single 3′ x3′ wooden bin with a removable front board and hinged lid.
Outcome: layered correctly and turned every 2 weeks, the pile produced usable compost in about 3 months during warm weather. When temperatures dropped in November, insulation with straw slowed cooling, but the pile still matured enough to use on spring beds.
FAQ
How often should I turn my compost?
For hot composting, turn every 2–3 weeks to keep oxygen moving and heat distributed; that accelerates breakdown and helps kill many weed seeds. For low-effort bins, turning every 4–8 weeks is fine, but expect a longer finish time. In winter, reduce frequency to every 4–6 weeks if frozen.
Can I compost in winter?
Yes, but activity drops sharply below freezing. Increase pile size or insulate the bin with straw, a tarp, or an old blanket to retain heat. For steady year-round processing, use vermicomposting indoors or a sheltered bin in an unheated garage.
What’s the best way to stop fruit flies?
Bury fruit scraps under 2–3″ of browns and keep a tight lid until flies subside. A small top layer of finished compost or dry leaves works well; avoid leaving open fruit in a shallow bin. Commercial fruit fly traps help, but the main fix is removing breeding substrate.
Do I need special worms for composting?
For standard outdoor hot composting, wild soil worms will assist, but aren’t necessary. For vermicomposting in shallow bins, use red wrigglers (Eisenia fetida); they reproduce quickly and process kitchen waste efficiently. Avoid using garden earthworms in confined worm bins—red wrigglers prefer that environment.
How much space should I leave around a bin?
Leave at least 1–2 ft clearance for access, turning, and airflow; tighter spacing makes maintenance awkward and reduces ventilation. If you plan multiple bins for rotational batches, allow a 3–4 ft working corridor between units for comfortable loading and turning.
Read Next: Easy DIY Trellis Ideas for Climbing Plants
Read Next: How to Make Organic Liquid Fertilizer at Home
Read Next: DIY Garden Markers That Last All Season